Showing posts with label Image Processing. Show all posts

November 14, 2009

Focus Stacking

Focus Stacking is extremely useful in macro works. as I mentioned before, the Depth of Field (DOF) in macro photography is so shallow that even 1mm of movement makes huge difference.

In order to get maximum DOF, theoretically we must use the smallest aperture possible. However problem like diffraction & lack of light (exposure) arises when you use the smallest aperture. You still get maximum DOF in smallest aperture, but you don't get the sharpest picture.

The other solution to this is focus stacking. Take several pictures with different area of focus of a close up object and blend the pictures into a single picture, only keeping the focused area.

Here is an example:
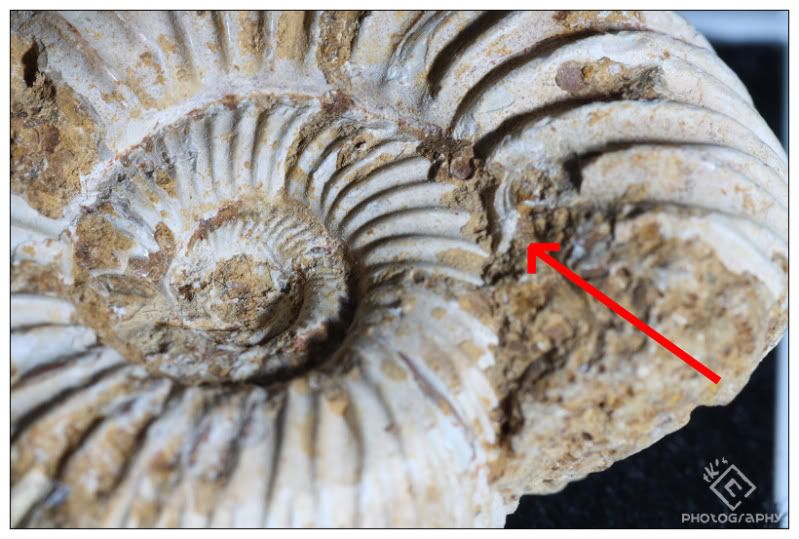

(focus #1, look at the arrow, that area is out of focus)
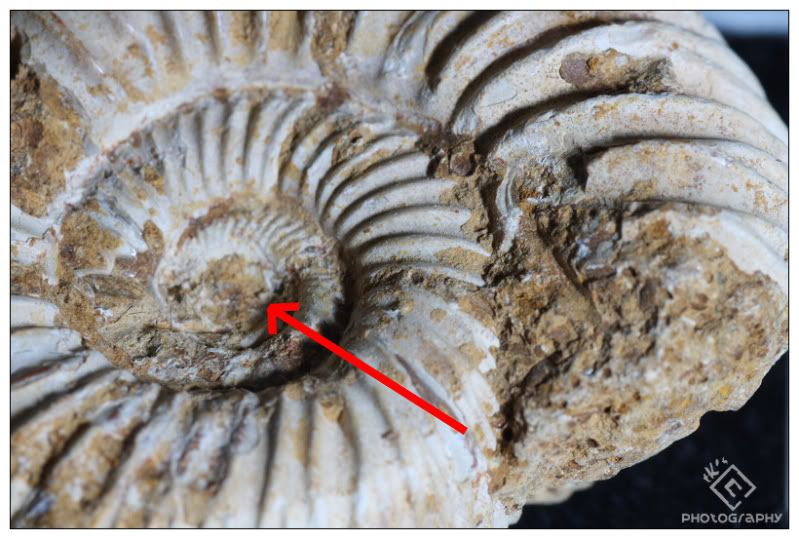

(focus #2, look at the arrow, that area is out of focus)


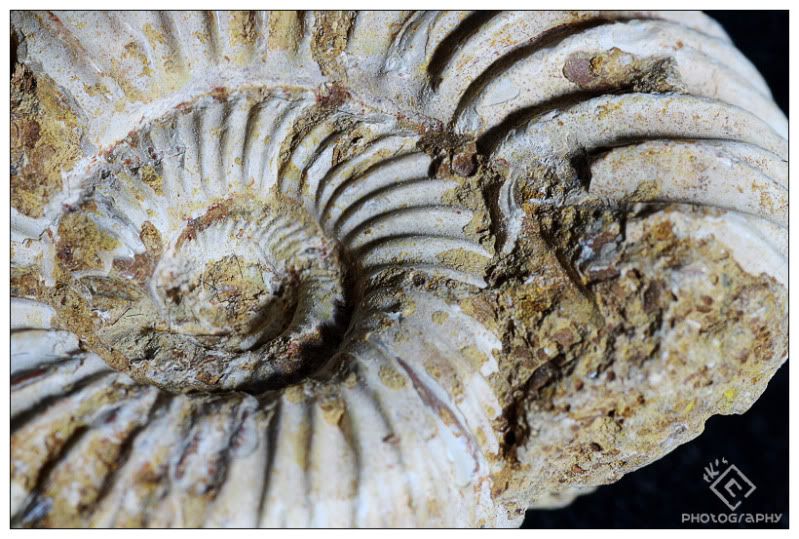
After focus stacking:


(look at the 2 area previously pointed by the arrow, they are now sharp & crisp)


Bear in mind that there are still other areas in the picture is out of focus, they can easily fixed by stacking the 3rd and 4th picture and so on...

In this example, only 2 pictures are used.


Tutorial:

1) File > Scrips > Load File into Stack. Choose the source files, tick the "Attempt to Automatically Align Source Images" check-box.

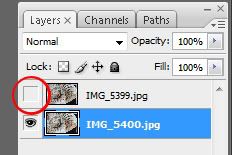
2) Select the most bottom layer, turn off visibility all other layers. Add a layer mask for the bottom layer and use Brush tool (B) to paint out any area that are not sharp.


(The visibility of other layers have been turned off, the visibility is indicated by the eye icon)


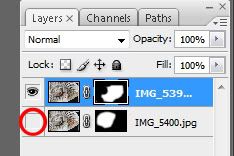
3) Repeat step 2 for other layers. Only work on 1 layer at a time and only turn on visibility of 1 layer a time.


(the visibility of first layer is turned off)


4) Reveal all layers, if the picture looks OK, flatten and crop out the edge. Adjust Curve, Saturation and finally Sharpen the picture.

October 30, 2009

Adding Rainbow!

Here's a simple one.

Before:


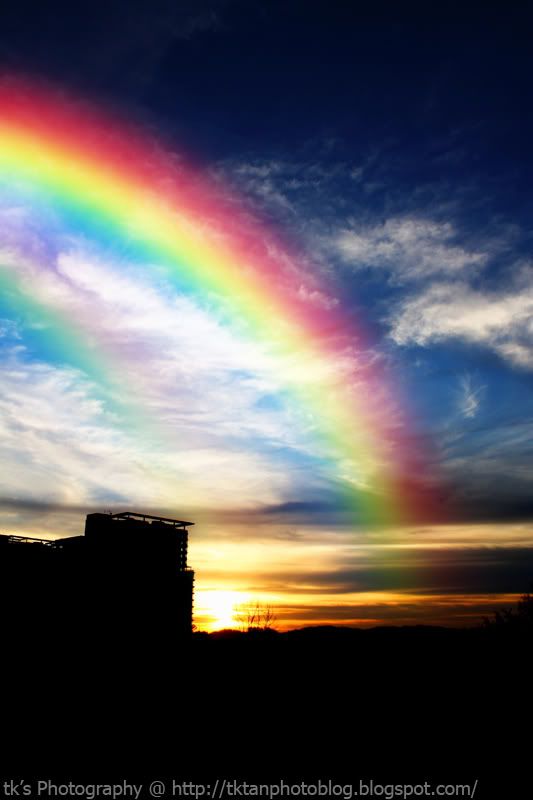
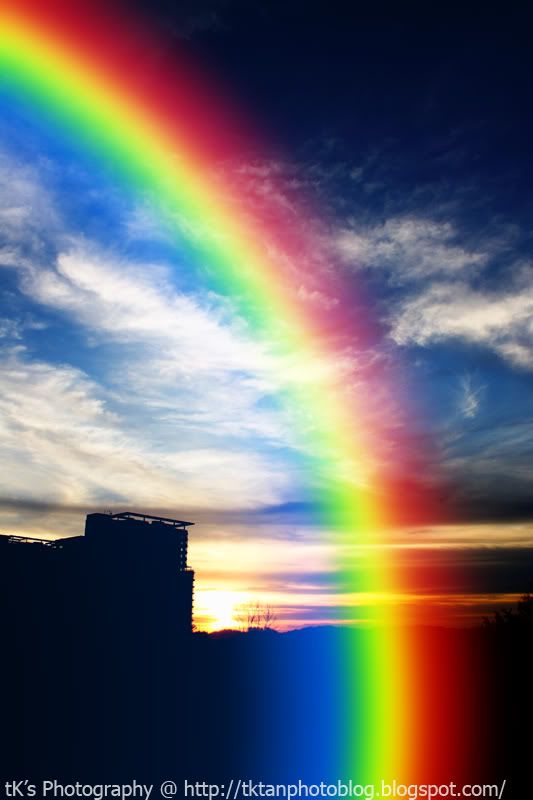
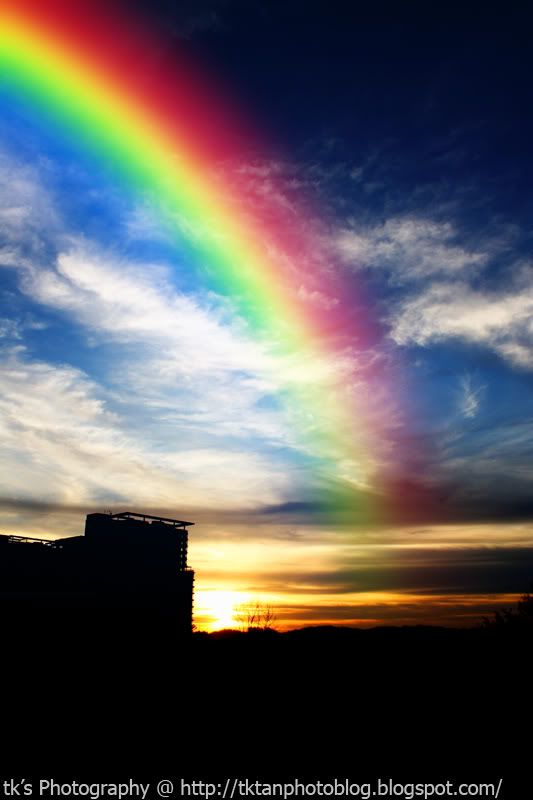
After:


It is very simple to make this in Photoshop.

1) Open an image. An image with plenty of sky will do.

2) Click on the "Create New Layer" icon on the bottom right corner (just beside the bin).

3) Select Gradient Tool (or press "G").

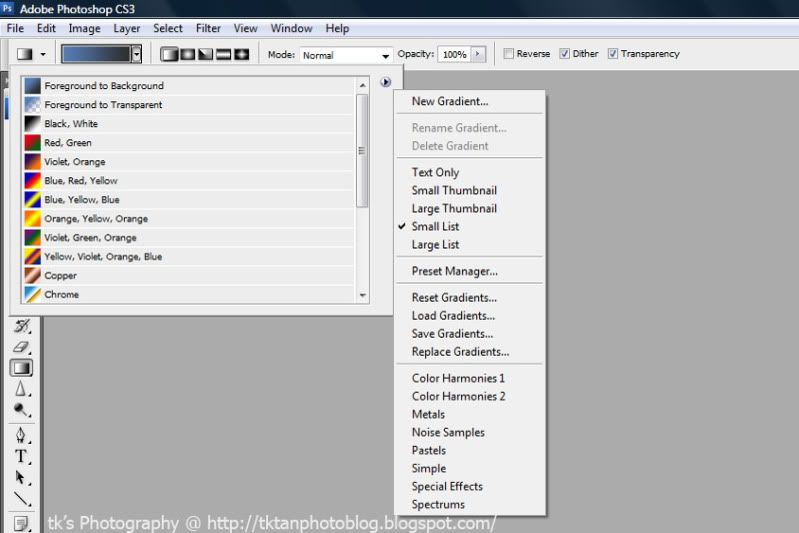
4) Select "Special Effects" (second from the bottom) from the Gradient Picker drop-down menu. Select "Append" if Photoshop prompt you something about replacing the gradients.


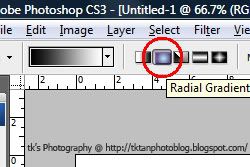
5) Select "Radial Gradient".


6) Place your cursor on either side of the horizon, hold down Shift and drag your mouse pointer towards another end of photo. The releasing point is where you want the rainbow to appear. Try few times to get the optimum result.

7) An artificial rainbow should appear, and it looks fake. Select "Screen" blend mode instead of "Normal" (there is a drop-down menu under the Layer tab, beside the "Opacity" and "Fill" on your bottom right).

8) To make it more realistic, apply some blur by choosing Blur > Gaussian Blur. Set the amount according to your taste. I normally use a higher value (I.e: 60+).

9) The rainbow now should look like this:


Its still fake though.

10) Select the gradient tool again, choose "Foreground to Background" (1st one) again. Select Linear Gradient (beside the Radial Gradient).

11) Add a Layer Mask (3rd icon from left, beside the "fx" icon).

12) Now hold your Shift and place your mouse pointer on the horizon of the landscape. Pull upwards to make the bottom part of the rainbow disappear. You may need to try few times to get the most natural result. You can always reduce your opacity if your rainbow looks too saturated and fake.

13) Your rainbow should look like this:


14) Press Ctrl + J to duplicate the layer, set the opacity to around 75% in order to add more vibrance to your photo.

15) Flatten your image and save.


Tips:

- Use brush to tidy up (after Step 12) any unnecessary rainbow that appear in your horizon.
- The direction of rainbow will look natural when it is bending outwards the source of light in your image. Bending inwards will look fake.
- If the rainbow looks too think, you can always use Free Transform Tool (Ctrl + T) to squeeze it smaller.
- Select a scene/picture that will most probably have a rainbow in it. For example, my tutorial picture is actually not very suitable as it is very hard to see rainbow during sunset.
- You can duplicate the rainbow and make "double rainbow" effect.

October 08, 2009

Photoshop Fun

I was a Photoshop (PS) noob. I know zero about PS, until then I understood the concept of layers in PS. Well, I do not call myself a PS pro (yet), I'm more towards PS beginner now.

By utilizing layers in PS, I can do this now:


I know its simple for many of you out there, but for me, this is unimaginable. I never think that I can produce something like this.

Besides, I have learned some other techniques too such as Sharpening using High Pass, Portrait Skin Smoothing and etc.

PS is fun!

August 18, 2009

Toy Town Effect

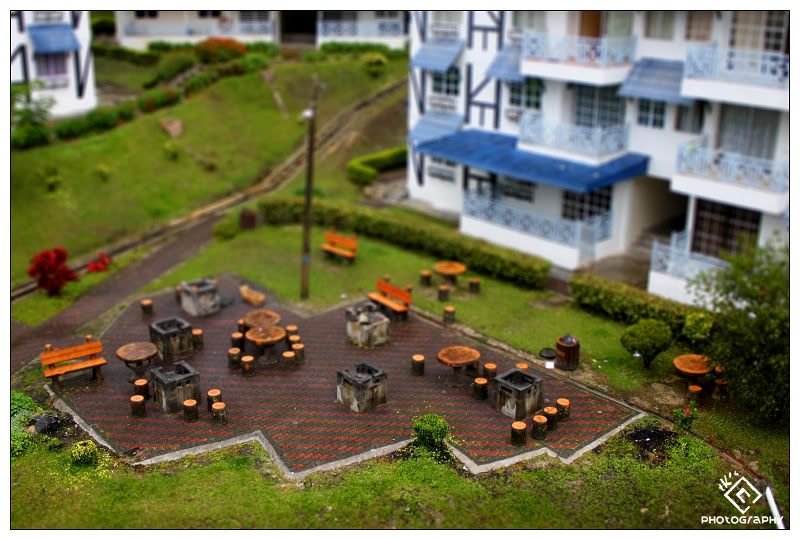
Have you encountered some pictures that look like miniatures but it's actually a real world's scene? This is called Toy Town Effect. There are several ways to achieve this. Firstly, using a Tilt & Shift lens such as Canon's TS-E 24mm f/3.5L II lens. However, this approach is costly (The lens itself costs RM4,500++). The cheaper alternative is to get a Lensbaby but the effect is not so well executed. The cheapest way to do this is faking it in Photoshop.


(Click to have a better view)


I will have a simple tutorial here to illustrate ways to do this.

1) Choose / Take the picture. Pictures with wider angle to include the environment and with few people/objects is suitable. Please make sure the people/object in the picture is small and does not dominate the frame. Do NOT include the sky in the picture as this will definitely spoil the feel of a miniature.

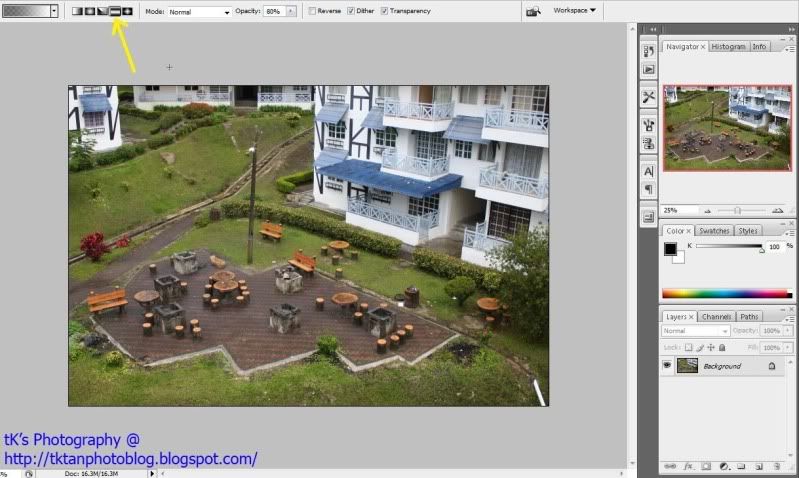
2) Enter Quick Mask Mode (Q). Select Gradient Tool (G). Make sure you select the Reflected Gradient (2nd from the right side).


3) Drag a vertical line from bottom to top. The starting point is where your picture should look sharp. The shorter the line is, the narrower the focused area is going to be.


4) Press Q to exit Quick Mask Mode. Select Filter > Blur > Lens Blur. Try to experiment with different attributes until satisfied and press OK. Ctrl + D to Deselect.

5) To further enhance the effect of Toy Town, Adjust the Curve (Ctrl + M) to boost the contrasts and increase the Saturation (Ctrl + U) by making it to look a little bit fake. Adjust accordingly to taste, just don't overdo everything.

Tips:

- Avoid Sky
- Small people/object
- Avoid moving objects (freeze it if possible)
- Choose scenes with not-so natural lighting conditions. Find those with a potential "indoor lighting/fake lighting/artificial lighting" feel.
- Higher angle (when taking photo) have more depth of field (DOF). Lower angle have smaller DOF.
- Get creative.

August 02, 2009

Spherical Panorama

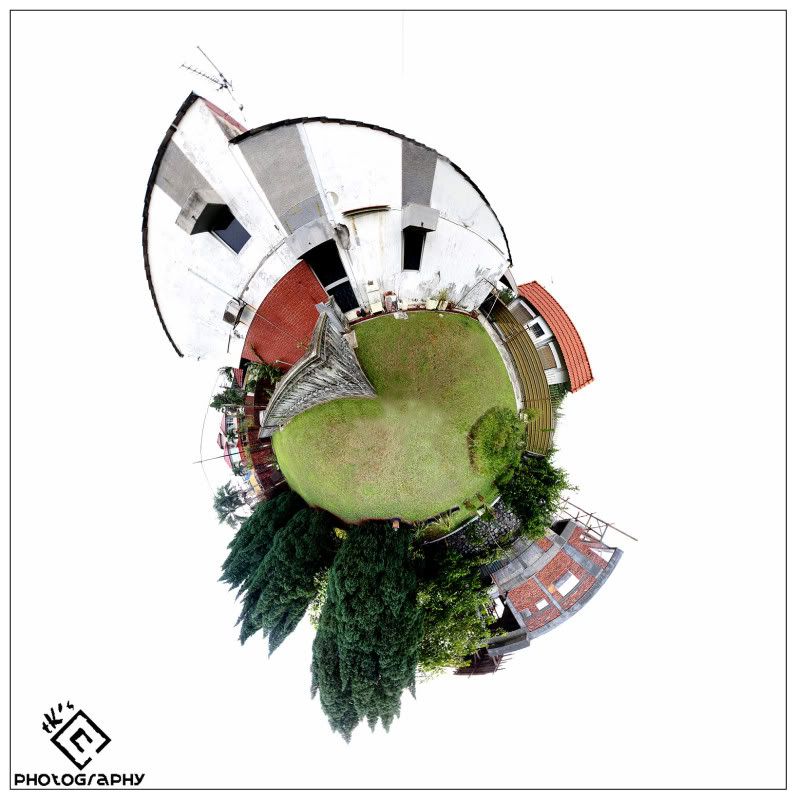
Recently I read an article on creating an unusual panorama photo, different from the common "flat & long" panorama pictures out there. They called it spherical panorama or some call it photosphere panorama.

The concept is easy, a 360 degree view, warped into a spherical object, resembling the earth or some planet.

This was my first try:


"My World"

I call it "My World" because this is where I lived & this is where I grow. This is actually by backyard of my house.

The proper way to do this is actually using a panorama head to avoid parallax when rotating your camera. Furthermore, to shoot a perfect spherical panorama, you need to shoot extra few frames of photo to include the sky and the ground directly above and below the tripod. These 2 angle are called Nadir & Zenith. In my example. I'm just using a simple tripod and I did not shoot these 2 extra shots.

I will start off a simple tutorial on how to do it, and I believe most of your PS skill is a lot better than me:

1) Setting up. Find a spot that has enough foreground and trees & buildings surrounding you should not be too near to you as you have to include the whole building or tree in your frame (their top part should not be cut off).

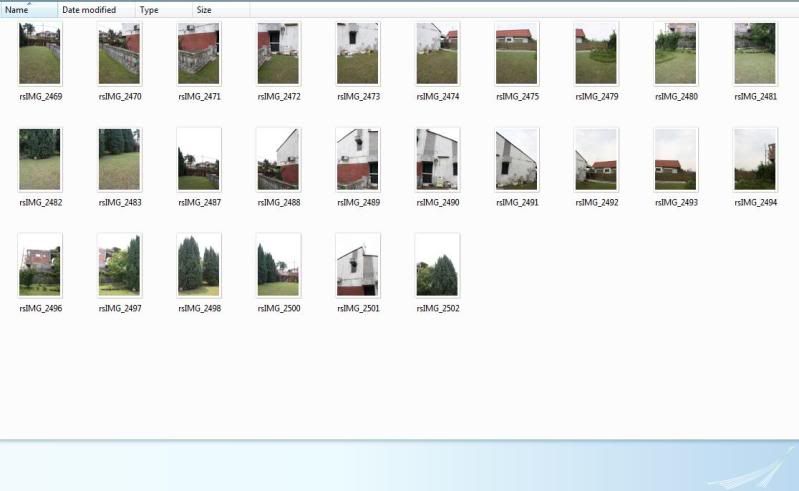
2) Shoot a series of photo. Making sure 360 degree of the scene is covered. Make sure the horizon level is straight before you shoot. For the shot above, I have set my camera to vertical orientation and shoot 2 layers of 360 degree panorama (due to my 18mm end is not wide enought to cover enough foreground + building in whole). I also shoot extra few shots to cover the roof of the building that has been cropped off.


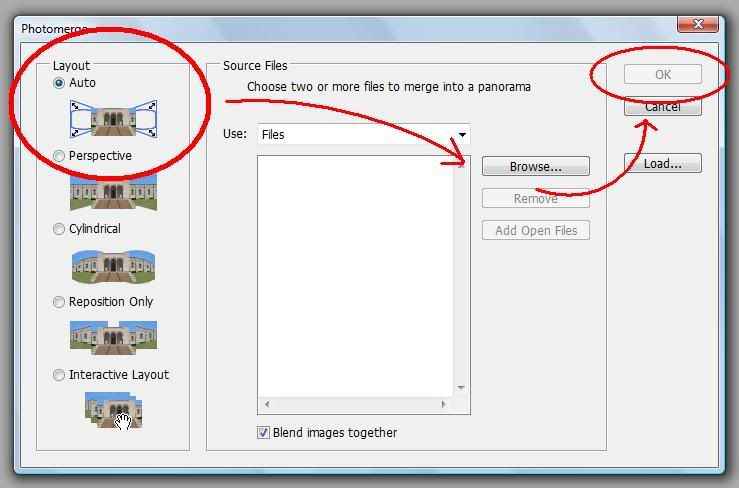
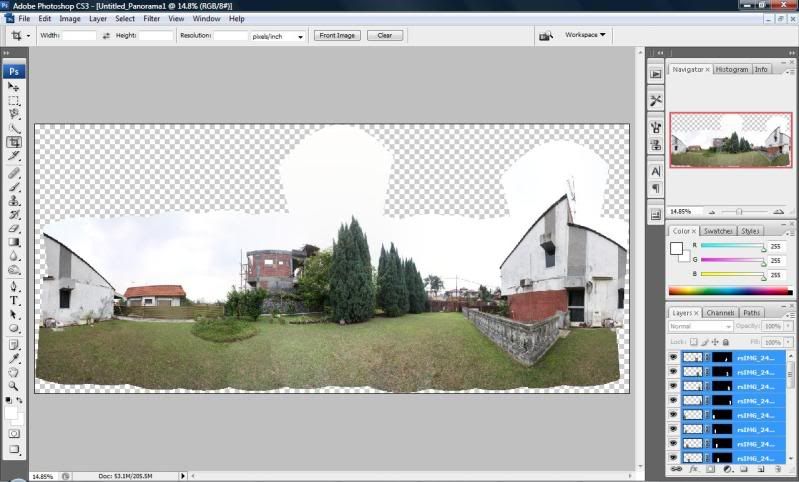
3) Stitching it. Go to your Photoshop, choose Edit > Automate > Photomerge. Choose Auto option and load your series of photo. This may take a while.


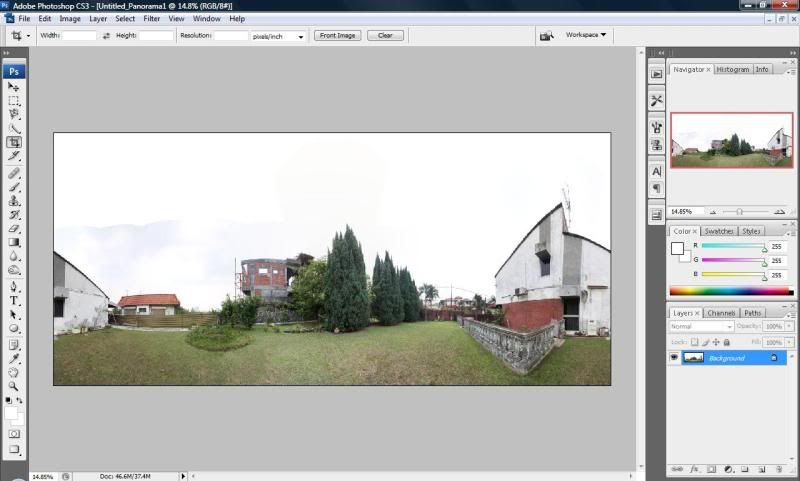
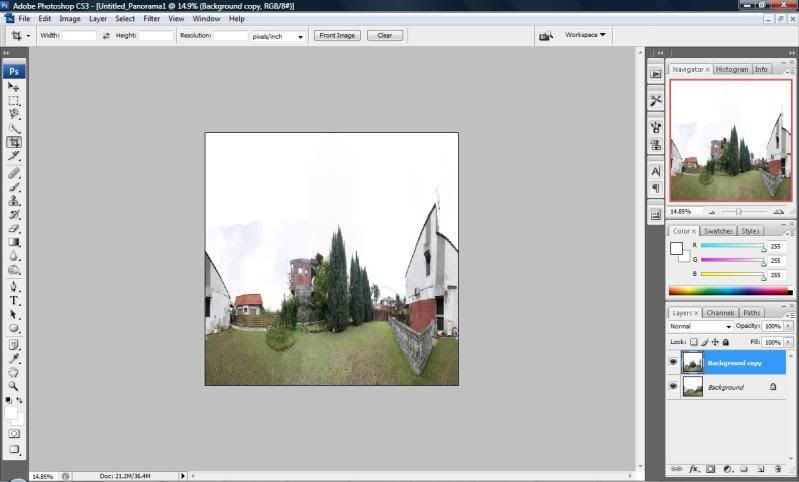
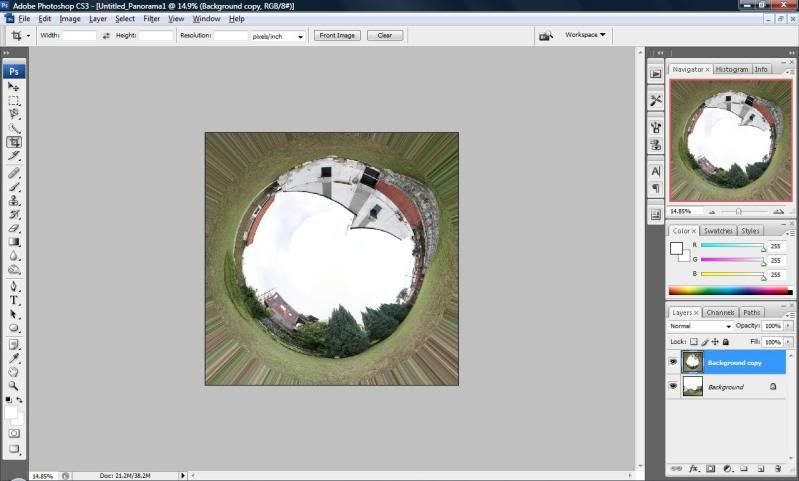
4) Processing. In this step, most of you are certainly better than me in PS, so this is just a guide. I will firstly flatten the image, crop off the awkward edges. Then duplicate a layer, Press Ctrl + T (Free Transform), squeeze the photo into a square, crop off any excessive backgrounds.


After this, you will get a square image that look ugly. However, this is necessary to wrap your image into a globe-like object, if the image is not square, your globe will become oval instead a sphere.


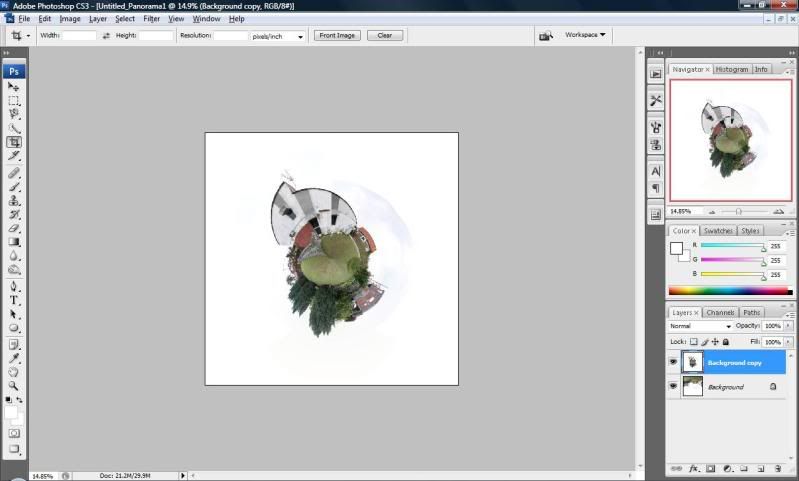
There are 2 variations of spherical panorama. The one I show you requires you to rotate your picture 180 degree by selecting Image > Rotate Canvas > 180°.

Then select Filter > Distortion > Polar Coordinates. This will wrap the photo into a spherical object. You can try this step without rotation the image 180 degree. Compare these 2 variants and see which worked best for you. In my example above, the rotated images looks better.


(Variation 1)


(Variation 2)


5) Tidy up. You will see some ghosting or overlapping between images. Use Clone Stamp Tool and/or Healing Tool to clone out them (I'm weak in this part). Adjust the Curve & Level to further enhance the contrasts & saturation. Sharpen and Flatten the image. Finally, crop out excessive space of the picture.

The reason I choose to shoot in under a cloudy day is to avoid the hassle of taking account the sky. In the example above, I just dragged the Curve to burn out the sky.

Hope you enjoy the whole new perspective to panorama photography.
Related Posts with Thumbnails