The concept is easy, a 360 degree view, warped into a spherical object, resembling the earth or some planet.
This was my first try:
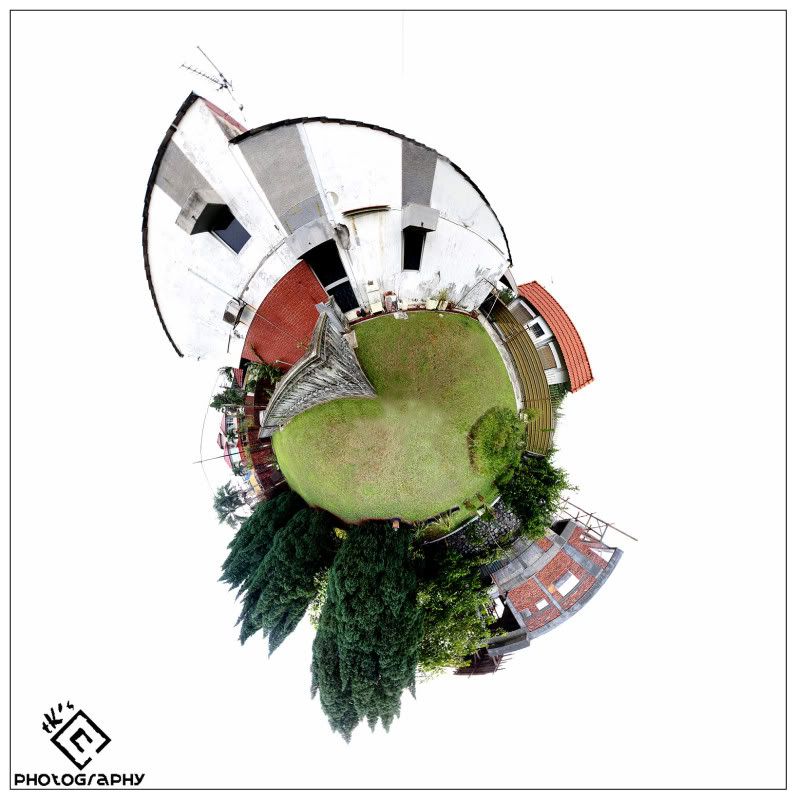 "My World"
I call it "My World" because this is where I lived & this is where I grow. This is actually by backyard of my house.
The proper way to do this is actually using a panorama head to avoid parallax when rotating your camera. Furthermore, to shoot a perfect spherical panorama, you need to shoot extra few frames of photo to include the sky and the ground directly above and below the tripod. These 2 angle are called Nadir & Zenith. In my example. I'm just using a simple tripod and I did not shoot these 2 extra shots.
I will start off a simple tutorial on how to do it, and I believe most of your PS skill is a lot better than me:
1) Setting up. Find a spot that has enough foreground and trees & buildings surrounding you should not be too near to you as you have to include the whole building or tree in your frame (their top part should not be cut off).
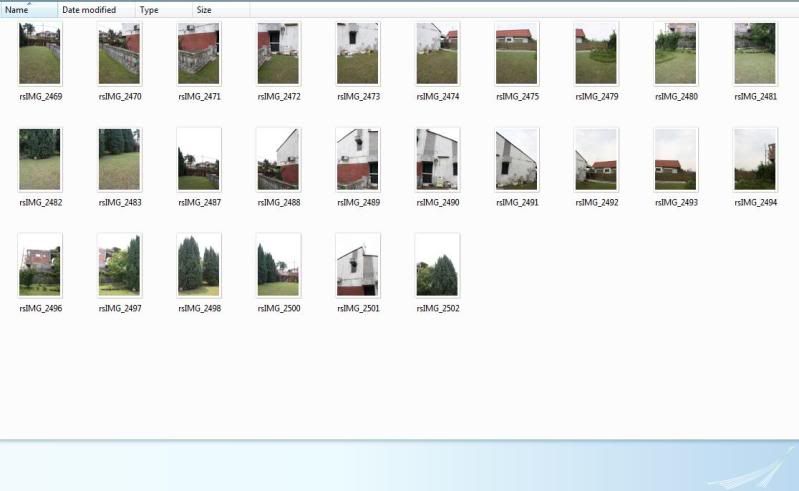
2) Shoot a series of photo. Making sure 360 degree of the scene is covered. Make sure the horizon level is straight before you shoot. For the shot above, I have set my camera to vertical orientation and shoot 2 layers of 360 degree panorama (due to my 18mm end is not wide enought to cover enough foreground + building in whole). I also shoot extra few shots to cover the roof of the building that has been cropped off.
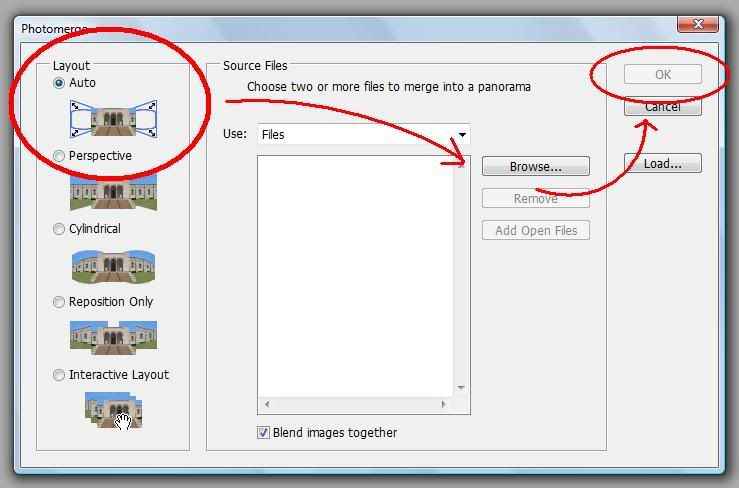
3) Stitching it. Go to your Photoshop, choose Edit > Automate > Photomerge. Choose Auto option and load your series of photo. This may take a while.
4) Processing. In this step, most of you are certainly better than me in PS, so this is just a guide. I will firstly flatten the image, crop off the awkward edges. Then duplicate a layer, Press Ctrl + T (Free Transform), squeeze the photo into a square, crop off any excessive backgrounds.

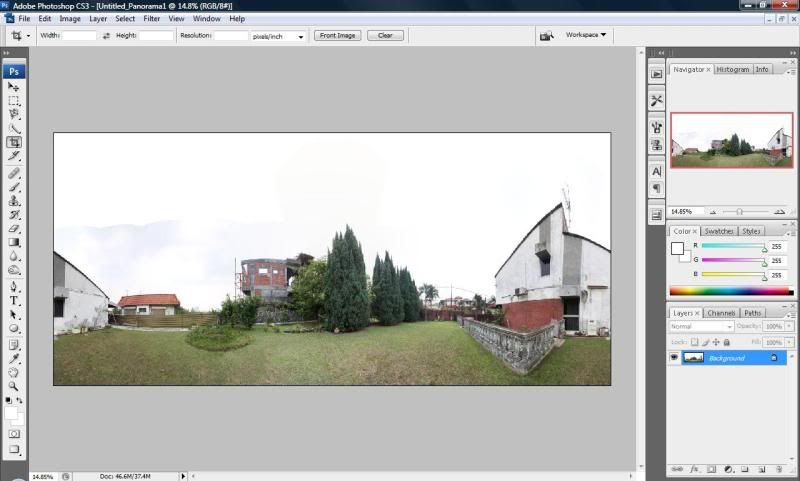
After this, you will get a square image that look ugly. However, this is necessary to wrap your image into a globe-like object, if the image is not square, your globe will become oval instead a sphere.

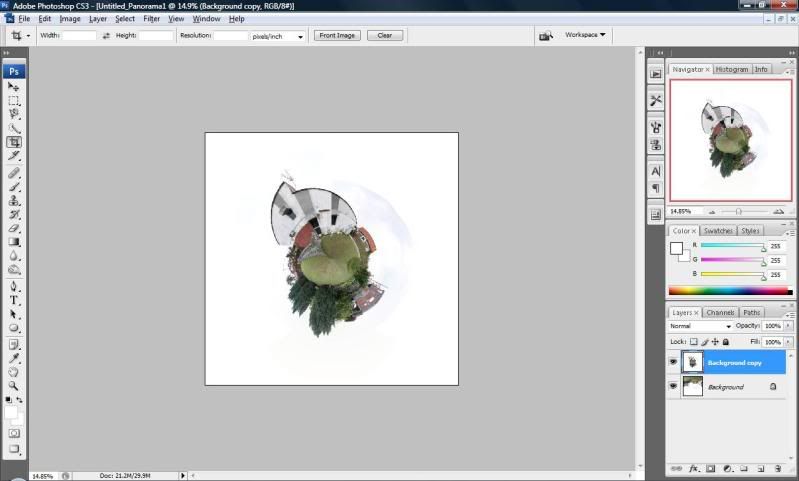
There are 2 variations of spherical panorama. The one I show you requires you to rotate your picture 180 degree by selecting Image > Rotate Canvas > 180°.
Then select Filter > Distortion > Polar Coordinates. This will wrap the photo into a spherical object. You can try this step without rotation the image 180 degree. Compare these 2 variants and see which worked best for you. In my example above, the rotated images looks better.
 (Variation 1)
 (Variation 2)
5) Tidy up. You will see some ghosting or overlapping between images. Use Clone Stamp Tool and/or Healing Tool to clone out them (I'm weak in this part). Adjust the Curve & Level to further enhance the contrasts & saturation. Sharpen and Flatten the image. Finally, crop out excessive space of the picture.
The reason I choose to shoot in under a cloudy day is to avoid the hassle of taking account the sky. In the example above, I just dragged the Curve to burn out the sky.
Hope you enjoy the whole new perspective to panorama photography.
The proper way to do this is actually using a panorama head to avoid parallax when rotating your camera. Furthermore, to shoot a perfect spherical panorama, you need to shoot extra few frames of photo to include the sky and the ground directly above and below the tripod. These 2 angle are called Nadir & Zenith. In my example. I'm just using a simple tripod and I did not shoot these 2 extra shots.
I will start off a simple tutorial on how to do it, and I believe most of your PS skill is a lot better than me:
1) Setting up. Find a spot that has enough foreground and trees & buildings surrounding you should not be too near to you as you have to include the whole building or tree in your frame (their top part should not be cut off).
2) Shoot a series of photo. Making sure 360 degree of the scene is covered. Make sure the horizon level is straight before you shoot. For the shot above, I have set my camera to vertical orientation and shoot 2 layers of 360 degree panorama (due to my 18mm end is not wide enought to cover enough foreground + building in whole). I also shoot extra few shots to cover the roof of the building that has been cropped off.
3) Stitching it. Go to your Photoshop, choose Edit > Automate > Photomerge. Choose Auto option and load your series of photo. This may take a while.
4) Processing. In this step, most of you are certainly better than me in PS, so this is just a guide. I will firstly flatten the image, crop off the awkward edges. Then duplicate a layer, Press Ctrl + T (Free Transform), squeeze the photo into a square, crop off any excessive backgrounds.
After this, you will get a square image that look ugly. However, this is necessary to wrap your image into a globe-like object, if the image is not square, your globe will become oval instead a sphere.
There are 2 variations of spherical panorama. The one I show you requires you to rotate your picture 180 degree by selecting Image > Rotate Canvas > 180°.
Then select Filter > Distortion > Polar Coordinates. This will wrap the photo into a spherical object. You can try this step without rotation the image 180 degree. Compare these 2 variants and see which worked best for you. In my example above, the rotated images looks better.
(Variation 1)(Variation 2)5) Tidy up. You will see some ghosting or overlapping between images. Use Clone Stamp Tool and/or Healing Tool to clone out them (I'm weak in this part). Adjust the Curve & Level to further enhance the contrasts & saturation. Sharpen and Flatten the image. Finally, crop out excessive space of the picture.
The reason I choose to shoot in under a cloudy day is to avoid the hassle of taking account the sky. In the example above, I just dragged the Curve to burn out the sky.
Hope you enjoy the whole new perspective to panorama photography.
Great idea.. looks cool...
ReplyDeletethanks! i learn something new!!
ReplyDelete1st time here~ nice to meet u!