(Click to have a better view)
I will have a simple tutorial here to illustrate ways to do this.
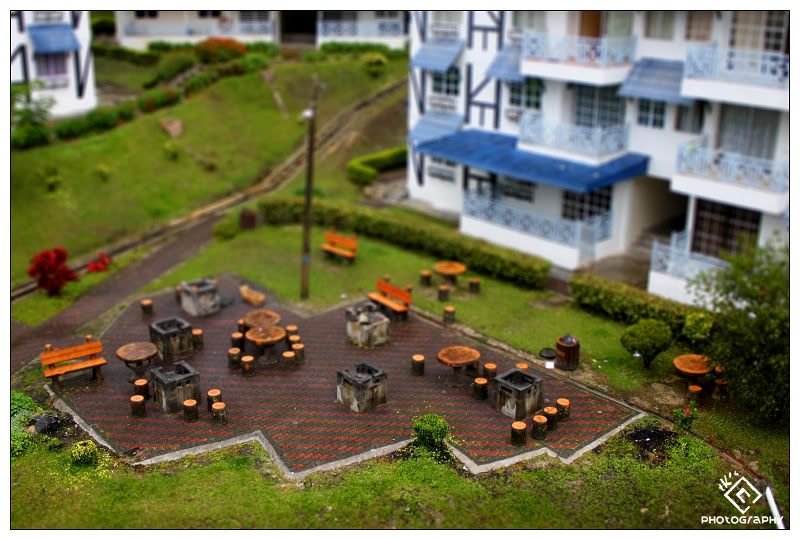
1) Choose / Take the picture. Pictures with wider angle to include the environment and with few people/objects is suitable. Please make sure the people/object in the picture is small and does not dominate the frame. Do NOT include the sky in the picture as this will definitely spoil the feel of a miniature.
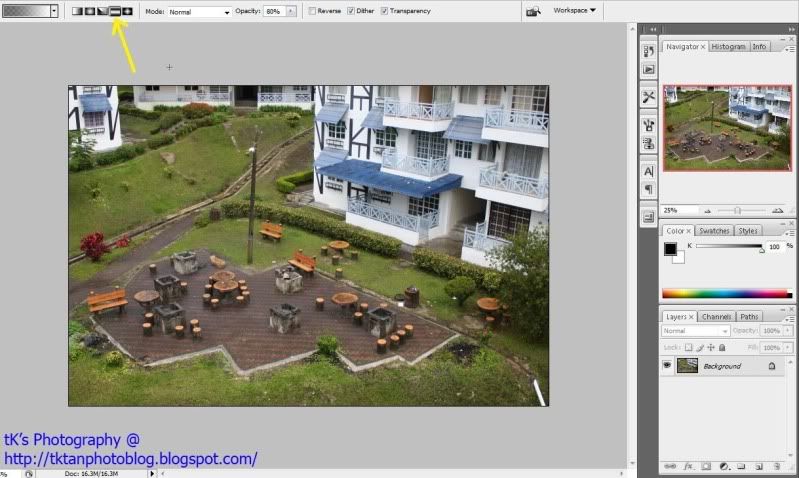
2) Enter Quick Mask Mode (Q). Select Gradient Tool (G). Make sure you select the Reflected Gradient (2nd from the right side).
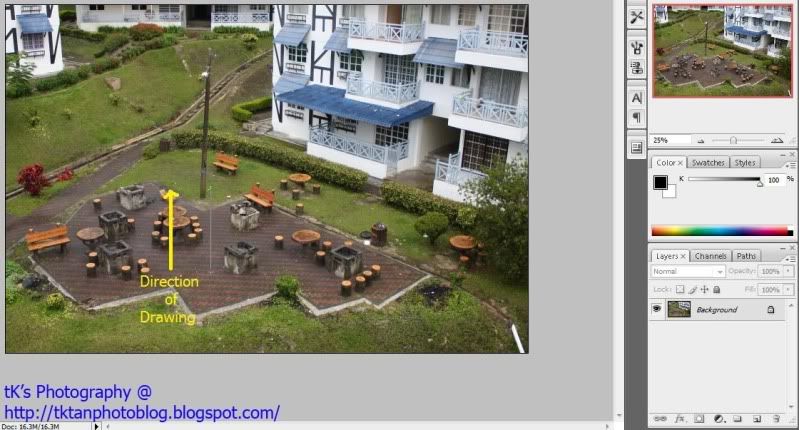
3) Drag a vertical line from bottom to top. The starting point is where your picture should look sharp. The shorter the line is, the narrower the focused area is going to be.
4) Press Q to exit Quick Mask Mode. Select Filter > Blur > Lens Blur. Try to experiment with different attributes until satisfied and press OK. Ctrl + D to Deselect.
5) To further enhance the effect of Toy Town, Adjust the Curve (Ctrl + M) to boost the contrasts and increase the Saturation (Ctrl + U) by making it to look a little bit fake. Adjust accordingly to taste, just don't overdo everything.
Tips:
- Avoid Sky
- Small people/object
- Avoid moving objects (freeze it if possible)
- Choose scenes with not-so natural lighting conditions. Find those with a potential "indoor lighting/fake lighting/artificial lighting" feel.
- Higher angle (when taking photo) have more depth of field (DOF). Lower angle have smaller DOF.
- Get creative.
No comments:
Post a Comment